How to effectively clear the cache for your WordPress website hosted on Cloudflare’s CDN, covering step-by-step instructions for clearing the cache for individual files or the entire site using the Cloudflare plugin, and why clearing the cache is important for maintaining optimal website performance and user experience.
Cloudflare is a popular content delivery network (CDN) that provides a wide range of services to help website owners speed up their sites, protect them from cyberattacks, and improve their overall performance. One of the features that Cloudflare offers is caching, which stores a website’s static content on its servers to reduce the amount of time it takes for the content to load on a user’s browser. However, when you make changes to your website, you might need to clear the cache to ensure that visitors are seeing the latest version of your content. In this article, we will discuss how to clear the Cloudflare cache on a WordPress blog using the Cloudflare plugin.
Why Clearing the Cache is Important?
When you update your WordPress blog, you might notice that the changes don’t appear immediately. This is because the old version of the content is still stored in the cache, and the browser is displaying that instead of the new version. This can cause confusion for your visitors, who might think that your website is not working properly. Clearing the cache ensures that the browser is displaying the most up-to-date version of your website, which can help improve user experience and avoid confusion.
How to Clear the Cloudflare Cache on a WordPress Blog
To clear the Cloudflare cache on your WordPress blog, you can use the Cloudflare plugin. This plugin allows you to clear the cache for individual files or for the entire site. Here are the steps to follow:
Step 1: Install and Activate the Cloudflare Plugin
The first step is to install and activate the Cloudflare plugin on your WordPress blog. You can download the plugin from the WordPress plugin repository or from the Cloudflare website. Once you have downloaded the plugin, go to your WordPress dashboard and click on “Plugins” from the left-hand menu. Then click on “Add New” and upload the plugin. Finally, activate the plugin.
Step 2: Connect Your WordPress Site to Cloudflare
Once the plugin is activated, you need to connect your WordPress site to Cloudflare. To do this, go to the “Settings” menu and click on “Cloudflare.” Then enter your Cloudflare email address and API key. You can find your API key in your Cloudflare account settings. Once you have entered your details, click on “Save API Credentials.”
Step 3: Clear the Cache
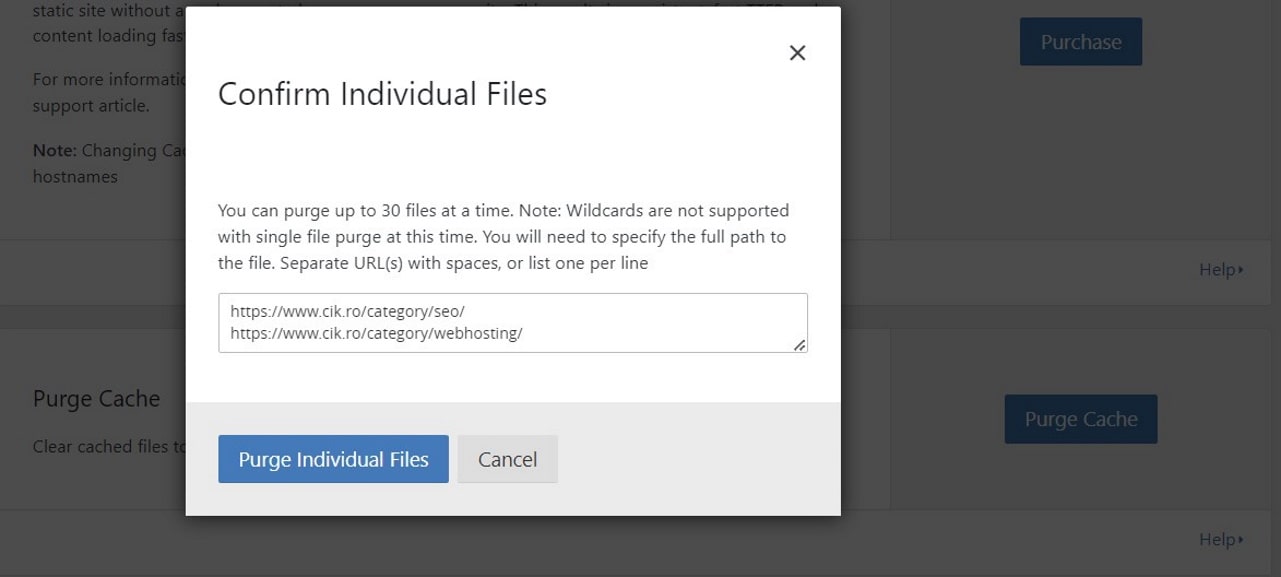
Now that your WordPress site is connected to Cloudflare, you can clear the cache. To clear the cache for individual files, go to the “Performance” menu and click on “Purge Cache.” Then select the files you want to clear the cache for and click on “Purge.” To clear the cache for the entire site, click on “Purge Everything” instead.
Step 4: Verify the Cache Has Been Cleared
After you have cleared the cache, you should verify that the changes have taken effect. You can do this by visiting your website and checking that the changes have been applied. If the changes have not been applied, you might need to wait a few minutes and try again. Cloudflare typically takes a few minutes to clear the cache, so be patient.
Clearing the cache on your WordPress blog is an important step to ensure that visitors are seeing the most up-to-date version of your content. With the Cloudflare plugin, you can easily clear the cache for individual files or for the entire site. By following the steps outlined in this article, you can ensure that your website is always displaying the most current content to your visitors.
Have you ever experienced a situation where your website was not displaying the latest version of your content due to caching? How did you resolve the issue?